Showing posts with label Tutorials. Show all posts

Thursday, 4 July 2013

Summer Makeup Look | Tropical Eyes


Hello girls!
Finally. The UK is expecting a heatwave this weekend! So, I've decided to do a summer makeup look and it's just in time!
I really like this look. I really love the eye colours and the lipstick I used is one of my favourites. This lipstick is so vibrant and summer themed and it's only from Poundland! It lasts all day with food and drink so it's great for summer; it's also very balmy too, it dries nearer the end of the day but is very moistursing when applied.

For summer, well all year for me, I really like a bronzed look. I apply more than usual and I always have a tan so I enjoy using this 2True one - it's not cakey although it looks very muddy looking. For this look, I used quite a bit of highlight. I love using a highlight and although I don't have very prominent cheekbones, I feel like this adds a bit of depth to my face and gives me a pretty, shimmery glow when the sun shines. 

As you can see I used Yellow, Green, Blue and Orange on my eyes. I really like these colours and I feel like my eyes look like a 'tropical' themed summer look - they're pretty!
I used my 120 pro palette, from Ebay, because there's a wide range of colours and they're pigmented.
For my eyes I knew that black would bring out the colours more - so I used some black eyeshadow on my lid and went over it with some Maybelline Gel Liner. I feel like this makes the colour 'pop' more. I feel like eyeliner always brings my eyes out more, anyway.

I really wanted 'dainty' looking lashes. I don't wear false ones so I have to be careful with my mascara options - my right eyelashes always look perfect and then my left lashes always go thick and clumpy and there's no return! So for my mascara I went with NYC's Showtime mascara as the wand is very basic and leaves my lashes in perfect condition!

What do you think of this look?
Are you daring enough to wear multicoloured eyes?!
x

Friday, 24 May 2013

Spring Makeup Look


Hiya everyone! 
I recently done this makeup look over on my Youtube channel and for those of you that haven't seen it - click here.
I really like the outcome of this look and I like how the colours go well together. I love pinks and greens in the spring and I really like how I've included my normal brown eye look into this but included a nice 'pop of colour' on the outer corners instead of a darker brown.

Face | For my face I used my everyday foundation which is the 'Match perfection' one from Rimmel. Like I've recently said, Rimmel foundations suit most people, me particularly and this one can be built up and loose powdered OR it can be left alone which works well if you like dewy skin. I used my typical loose powder for this look but instead of using it all over the face like I normally do, I applied it loosely and not pile it on! I gently applied it to the cheek area, so this time you can see a small glow whereas my everyday look doesn't have this, it will be more of a matte finish. 

Eyes | For my eyes I used the normal brown products that I use when I do a brown eye look. These are the Maybelline Colour Tattoo in 'on and bronze' and the first colour in the Sunkissed duo. I really like the light brown in the Sunkissed duo because I always apply it over the lid, crease and up to the brow. It's also not a matte colour but it isn't chalky at the same time - I really like it and surprised at how nice the colours are, considering it's not expensive. So I applied the brown colours as I normally would by using the Tattoo all over the lid, blending well and then applying the first colour of the Sunkissed duo all over my eye, ontop of the tattoo. I then used a 'Chit Chat' quad; these are from Poundland and I got them a while ago. They work incredibly well and I'm sure if you try these you'd be shocked at the pigment quality just as much as I was. I used the last green, the darker green, for this look and although this quad looks scary because it's a bit 'Pat Butcher' esque, once applied adnd blended they look ever so pretty. I applied the darker green in a V shape on my outer corner and blended well. I then used the mascara pictured for pretty, not heavy eyelashes and that's all I used! 

Lips | Lastly, for the lips, I applied the MUA Kissproof lipstain. I've not featured these on my blog so far but I got this one for Christmas and I've hardly used it. I decided to use it for this look and I really, really like them. I dont't have many lipstains but they're something I really like to use. I applied this one all over my lips and the colour was perfect & just what I wanted for this look. I then applied some gloss (defeats the object of a stain!) onto my lips to make them a bit more shimmery and that's the look done!

Like I said, I was so happy at how this turned out and the colours are gorgeous! I know we're well into May now but this would work for Summer too, so don't be afraid to use greens! Once you blend and apply them well I think they're the nicest colours to use and I think they have a bad reputation! 
I hope you all enjoyed this look and I'd love to see your Spring Looks! Leave pictures/links below if you'd like!

Happy May!
Zofia x


Sunday, 18 November 2012

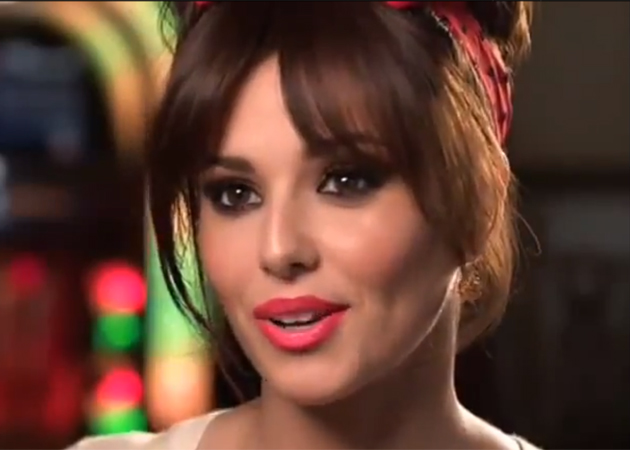
Cheryl Cole Inspired Look - Under The Sun


 Hey Lovelies!
So I tried to recreate this look, its not perfect but I think some aspects are quite ok!


 Please visit my Youtube (links on my blog) for how I did it!

Lots of love..

Monday, 5 November 2012

3D Lips

Hey Lovelies!


So recently on my Youtube I tried to create glossy, red lips.
I think they look ok-ish but I could have done better! 
You only need two lipsticks.. I used MUA shade 13 and Coral In Gold by Rimmel.
I applied a light red lipliner all round my lipline first, then applied the red lipstick to my outer lip. I then applied the same to the top outer lip. In the center I applied the coral In gold. Its simple but you could achieve this look better by using more matte lipsticks. Its really simple, go on my Youtube channel to find out  more and watch a tutorial.
Lots of love,

Friday, 2 November 2012

Autumn Inspired Look!


 Hey Lovelies!
So on my Youtube yesterday I created this look. Im sorry the camera was a bit wonky here & there but that was my first tutorial and I really wanted to do one, so the next thing I'll practise is my camera skills..
I thought it would be good to upload the pictures onto here etc, so you can have a really detailed look or whatever.
So Ill list the products I used and how I easily did the look! Hope you all enjoyed it, I was so nervous haha.

  • I thought all the colors used were great for autumn, I love shimmery browns and matte black eyeliner and im getting the hang of the 'winged look' now too!
  • Grey or white looks great in the inner corner of your eye as it makes them look slightly wider.
  • I used two eyeliners, MUA for the thinner line which is on the inner corner and then the Beauty Base one which has a slightly thicker wand for creating a double line, which leads outward for the wing.
  • I used the cats eyes mascara as it makes the lashes un-clumpy and has the perfect wand.
  • For the base, I used Maybelline Tattoo in On-And-Bronzed. This is great solo or great to build up.
  • For the grey color, you can use anything but I used the 'Zero Gravity' quad by Beauty Base - LA color.
  • For the outer part of my eye, I used the Rimmel Eyeshadows from savers. I used 103 Rock Star.
So yeah.. I hope that this look was a good enough one for my first tutorial. Im quite confident now, I've planned my next one, I just hope its not too bad! Haha!
Lots of love..


Sunday, 28 October 2012

Halloween Week! ..Cat Inspired Look.


Hey lovelies!
So its Halloween week and all week ive been putting up blog posts and videos of makeup thats good for Halloween.
I've put some Halloween colors to use and created an extra simple look.
I think it looks quite okay, and I'll be using this on Wednesday to answer the door!


  • So I used a dark shimmery grey for the eyeshadow. This is just out of a gift set and doesnt cost a lot so I think thats best if you're not going to use it again. I just used a fluffy brush and packed on to the lid.
  • The good thing about Halloween makeup is that you dont have to worry if things dont look right. For Halloween, things just fit into place.
  • I used the eyeliners pictured above to create a small, thick cats eye. I'm not amazing at cats eye but this looks okay!
  • Then I didnt apply eyeliner into the inner corners, I just defined the outer corners. 
  • Then I didnt use false lashes but you could if you wanted to!
  • Then for the whiskars all you need is liquid eyeliner and apply it the same as I did! This look is so easy.
  • I applied some bronzer to my non existing cheekbones.
  • I then applied shade 13 MUA lipstick which is essential for this look! You could also apply hot pink or barbie pink.
So I hope you enjoyed this inspired look!
Happy Halloween..


Tuesday, 2 October 2012

10 Day Beauty Challenge; Day Ten!


  • Day Ten; Ten Secrets.
So this might be quite hard! Im going to be honest so they're kinda like confessions? Enjoy!
  1. Most of the time, I forget to take my makeup off. Foundation, eyemakeup.. the lot! I dont actually care about this! I might sound a bit weird but I dont mind because the next day I cleanse a lot and clean my face properly. I dont wakeup with spots or anything, I have really good skin. It just doesnt bother me. 
  2. I dont have any 'high end' makeup apart from 1 MAC lipstick. I AM buying some soon, I'm improving haha.
  3. Im not amazing at applying makeup. Im not useless because I wouldnt have opened a blog and Youtube account.. but I wouldnt be able to be a makeup artist right now, just because EVERYONE needs improving on their skill! But its the one thing that I'm good at, im not good at much else!
  4. I dont have a biiiiiiiiiiig collection but its pretty good! I buy quite a bit of stuff but ive only recently bought a big collection of brushes.
  5. I only have a few eyeshadows bought from a shop.. all the others are gift sets (but they're amazing!)
...enough secrets now! I dont have anymore but the ones I said are quite.. lol.. I hope you enjoyed!

Lots of love..

Saturday, 29 September 2012

1O Day Challenge; Day Nine.

So, I'm finally back to blogging daily or recently, not every 2 weeks haha!
I need to finish this and its day 9, which is nine likes.
This was an easy one to do, I like a lot of things! 
  • Day Nine; Nine Likes.
I like this because its not extra heavy on the face, it looks good with loose powder
and its the perfect color for my skin. My color is 'nude'. This has lasted me since December.
The only thing thats bad is that the pump doesnt work.. but thats my fault!

It looks really thick but its lightweight once on. It looks really dark/orange but it
really matches your skin when you apply it. It also applies good via a brush or hands.

Youtube/you guys KNOW I love this! I cant apply my foundation without it!
Its only £2 but makes my skin feel so smooth and soft without that dewy finish
when I apply this. I dont like a dewy look and I have oily skin, but this is perfect.
The only bad thing? Im running out!

I found this in my local Poundland. Its abour £7 in Boots but I payed £1. I love the brush,
it makes my lashes thick&long but not overly clumpy. Its my everyday mascara now!
It was also my first mascara that I ever bought!

My fave perfume ever! Okay it was only £10.. but, I dont mind if it gets used, because
I can easily pay just £10 to get another one. It smells so so so lovely and
I've hardly used a lot anyway! I got this at Christmas 2011 so it always
reminds me of Christmas! aw.

Everyday essential! I go through stages of loving/hating this. When this is used up
I might try the MUA one, because this one is okay but it smudges.
I could apply this on waterline and top lash line at 9am, then, by 10.30am
my waterline would have a feint line, not as thick as I'd apply it.
Also, the outer corners of my eye, smudge so bad that I get a big black blob there..
Maybe its just my eye but its so annoying! I like the brush it comes with though.

It lasts a long time too! It gets a bit messy haha!

From Savers! I love savers, I also love this bronzer!
I use it all the time, not just summer. I dont really apply blusher because
It doesnt really look right on me.. unless I buy an expensive one but I never
really buy or fuss about blushers.

I love mosaics! This is quite shimmery but doesnt show on the cheeks.

My first ever MAC lipstick! 100% honest though.. I dont see the obsession with MAC.
To be honest, I've used it once and its ok, I like the color but I dont use it everyday.
I will buy more MAC but I wouldnt rush out to buy it. I like the Nicki one though.

It says its a satin finish BUT I actually thought it was matte because
its really drying.

Lots of love..


Friday, 28 September 2012

Step-By-Step ; How I Did My Bath Bombs!

  1. Get all your things together. You need Sodium Bicarb, Cornstarch, Citric Acid, Glycerin,  
  2. You need all your tools like a spoon and something to pack the mix into the mould.
  3. You then need to get coloring's and flavorings. I use blue and red which comes out pink
    if you add a small amount. Using two colors you can make many colors 'cause they're basic.
  4. Use a picnic/plastic spoon or teaspoon. 


  1. Use the spoon to determine the amount you add into your beaker. 
  2. Add the sodium first. 
  3. Im going on measurements to make one bath bomb, so, add 1 spoon
    of the sodium, this will be enough. Its a very thick powder, a lot like flour.

  1. On top of the sodium in the same beaker, add the cornstarch (one spoon). This is the same  consistency of the sodium, but yellow not white.
  2. Use the spoon to mix together, the texture makes me cringe! 
  3. This all blends together, but you wont see a reaction yet!

  1. Then, add 1 spoon of the citric acid.
  2. This is a crystal, hard, product but not a powder. 
  3. Dont add too much, it will ruin it. 
  4. Mix this all in.

  1. This is what it looks like!

  1. Then, add 5 drops of the glycerin! 
  2. Only add 5 at the start because if its too mushy it wont set and
    if its too hard it'll crumble..not as easy as it looks!

  1. Mix this all together, this is what it should look like if you
    make it okay and how the instructions are set.

  1. Add flavorings and coloring's now. 
  2. It will start to fizz as it mixes with the glycerin and powders.
  3. I love this color!

  1. This is a bit toooo mushy, i added a slight extra spoon of the citric acid.
  2. But, it may set ok.

  1. Add them to the moulds.
  2. It kept rising haha!
  3. You can use cookie cutters to mould them into shapes
    if you dont have anything round like this.

  1. Mine kept rising and pouring out the moulds, yours wont!

  1. Makes a slight mess so use an empty space!
  2. This comes off easily though, dont worry!

  1. In the end, you will have something like this.
  2. Dont push or hold them too tight because they will crumble.
  3. If they do crumble, put them in a dish and they will work in the bath still.
  4. They smell really nice too, they work as a pretty gift!
I hope you enjoyed this and this was a response to my video on making them, because you might prefer reading instructions than watching them:)


Lots of love...


Related Posts Plugin for WordPress, Blogger...